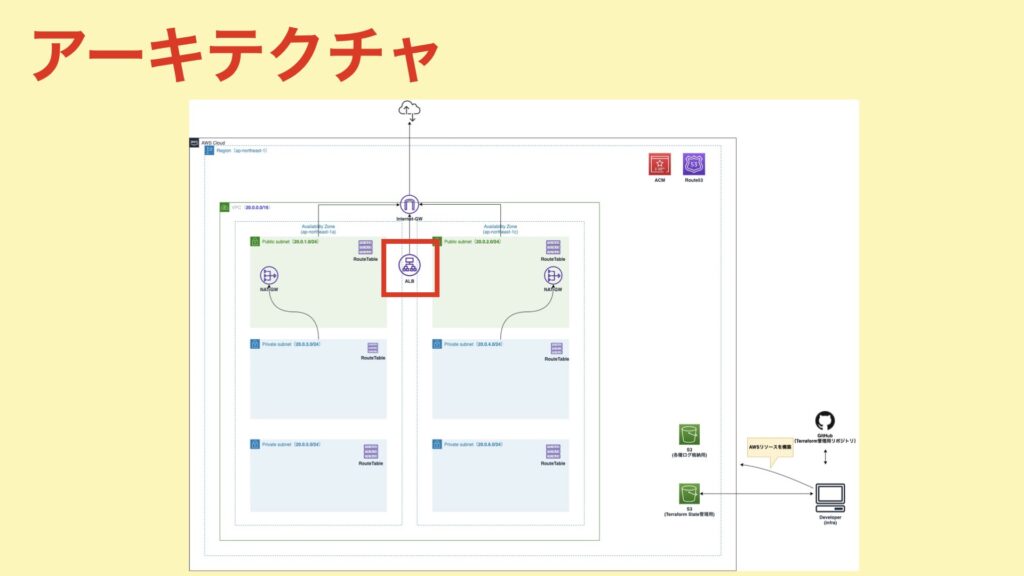
今回はWEBサーバ用のALB作成の2回目。前回まででALBに必要なリソースを作成したので、今回はALB本体を作成していきたいと思います。

前提
- 前回までの記事を読んでいること!
今回の目標
以下のリソースを作成します。
- ALB
- リスナー
- ターゲットグループ

ELBのタイプの比較
公式サイトに分かりやすい比較表があるので、一読しておくことをオススメします。

今回は、以下の理由によりALBを選択しています。
- HTTP、HTTPS通信のロードバランサーとして使用したい。(ALB採用)
- IP固定化は使用しない。(NLB除外)
- EC2-ClassicではなくVPCを使用する。(CLB除外)
- レイヤー7の機能を使用する。(リダイレクトや固定レスポンス)
ALBを作成する。
ALBを作成します。使用するリソースは、 aws_alb です。
terraform/system/modules/web/ec2_alb.tf
resource "aws_alb" "web" {
  name               = "web"

  # 作成するLBのタイプを指定します。今回は「application」を選択します。
  load_balancer_type = "application"

  security_groups    = [aws_security_group.alb_web.id]

  # キーの文字列に「_」を含むリクエストヘッダーを除外する。こちらを悪用した攻撃を防ぐために有効。
  drop_invalid_header_fields = true

  # ALBのアクセスログを格納するS3バケットの設定。
  access_logs {
    enabled = true
    bucket  = var.s3_logging_bucket
  }

  # ALBを作成するサブネットの指定。
  subnets                    = var.public_s
ubnets_id

  # アイドルタイムアウトの設定。
  idle_timeout               = 60

  enable_deletion_protection = false

  # HTTP2を利用するため有効にしています。
  enable_http2               = true

  # IPv6は使用しないため「ipv4」を選択。
  ip_address_type = "ipv4"

  # desync攻撃を防ぐためにデフォルト値を採用。
  # 参考:https://www.barracuda.co.jp/http-desync-attacks-a-variant-of-request-smuggling-attacks/
  desync_mitigation_mode = "defensive"
}
アイドルタイムアウトについて
「クライアント→ELB」、「ELB→バックエンド」この両方にで使用されるタイムアウト設定です。使われていない接続で、この値を過ぎると、その接続は切断されます。

また、バックエンドの各種タイムアウトは、ALBのアイドルタイムアウトよりも長く設定することが推奨されています。(「バックエンド側はタイムアウトしているが、ALB側はタイムアウトしていない。そのため、使用できない接続が残ってしまう。。」みたいな状況を避けるため。)

ターゲットグループを作成する。
ターゲットグループ(ALBの振り分け先)を作成していきます。
使用するリソースは、 aws_lb_target_group です。
terraform/system/modules/web/ec2_alb.tf
resource "aws_lb_target_group" "web" {
  name = "web"
  # 登録解除遅延の設定。登録を解除してから設定した秒数待って、解除が実行される。
  deregistration_delay = 300

  health_check {
    enabled             = true
    healthy_threshold   = 3
    interval            = 30
    matcher             = "200-299"
    path                = "/"
    port                = 80
    protocol            = "HTTP"
    timeout             = 5
    unhealthy_threshold = 3
  }
  # ルーティングアルゴリズムの設定。round_robinとleast_outstanding_requestsが選択可能。
  # round_robinはリクエストを均等に振り分けを行う。
  # least_outstanding_requestsはリクエストの処理が一番少ないターゲットにリクエストを振り分ける。
  load_balancing_algorithm_type = "round_robin"
  port                          = 8080
  protocol                      = "HTTP"
  protocol_version              = "HTTP2"
  slow_start                    = 0
  stickiness {
    enabled         = false
    type            = "lb_cookie"
    cookie_duration = 86400
  }
  vpc_id = var.vpc_id
}
登録解除遅延
ターゲットグループからターゲットを登録解除すると、ALBはそのターゲットへのリクエスト送信を停止します。登録解除遅延を利用することで、登録解除してから実際に解除されるまでの待ち時間を設定することができます。
※片系を切り離してデプロイしたいときに、処理中のリクエストを救いたいときなどの場面で使用することができます。
ヘルスチェック
登録されたターゲットに対してヘルスチェックを行うための設定。同じような設定項目が複数あり、分かりにくいんですが、是非理解しておきたい部分になります。
| 項目 | 説明 |
|---|---|
| healthy_threshold | ヘルスチェックの連続成功回数。この回数ヘルスチェックが成功すると、ステータスが正常だと判断されます。 |
| interval | ヘルスチェックの間隔。 |
| timeout | ヘルスチェックを失敗とみなすタイムアウトの時間。 |
| unhealthy_threshold | ヘルスチェックの連続失敗回数。 |
スティッキーセッション
ユーザーからのリクエストを特定のターゲットに固定してルーティングする機能。期間ベースとアプリケーションベースの2種類が存在します。
期間ベースは、ALBがCookieにAWSLBで値を設定します。有効期限は1秒から7日間を設定することができます。
アプリケーションベースは、ターゲットのアプリで独自に作成したCookieを使ってセッションを固定します。こちらも期間ベースと同じく期間を設定することができます。
※スティッキーセッションでは特定のターゲットに通信が固定化されてしまうため、ターゲットで障害が発生した場合その通信が途切れたり、ターゲットへの負荷分散が均等にならなかったりする可能性があります。そのため、セッション情報が外部データストア(RDBやKVSなど)で管理することをオススメします。
スロースタート
ALBは通常、ヘルスチェックが成功した直後にターゲットグループに対してリクエストを流します。スロースタートを利用することで、ヘルスチェック成功後、ターゲットグループにリクエストを流すまでの猶予時間を設定することができます。
リスナーを作成する。
作成するリスナーは2種類です。
1つ目は、HTTPSリクエスト(ポート443)に対するリスナー。
terraform/system/modules/web/ec2_alb.tf
resource "aws_alb_listener" "web_https" {
  load_balancer_arn = aws_alb.web.arn
  port              = 443
  protocol          = "HTTPS"

  # SSLポリシーは、AWS推奨のポリシーを使用。
  ssl_policy      = "ELBSecurityPolicy-2016-08"

  # SSL証明書は以前ACMで作成したものを使用。
  certificate_arn = var.ssl_certificate_study_infra_tk_arn

  # アクションの設定。
  default_action {
    # ターゲットへ通信をルーティングしたいので、転送(forward)を設定。
    type = "forward"

    forward {
      target_group {
        arn = aws_lb_target_group.web.arn
      }
      # スティッキーセッションは使用しないため無効。
      stickiness {
        enabled  = false
        duration = 604800
      }
    }
  }
}
2つ目は、HTTPリクエストをHTTPSリクエストにリダイレクトするリスナー。
terraform/system/modules/web/ec2_alb.tf
resource "aws_alb_listener" "web_http" {
  load_balancer_arn = aws_alb.web.arn
  port              = 80
  protocol          = "HTTP"

  default_action {
   # HTTPSにリダイレクトしたいため、リダイレクト(redirect)を設定。
    type = "redirect"
    redirect {
      port        = 443
      protocol    = "HTTPS"
      status_code = "HTTP_301"
    }
  }
}
Terraformを実行する。
1. /study-infra-aws-tutorial/terraform/system/staging/example.tfbackendを修正する。
- bucket:Stateを管理するS3バケット名に変更する。
- role_arn:Terraform実行用RoleのARNに変更する。
bucket   = "sample-bucket"
region   = "ap-northeast-1"
key      = "study-infra-tutorial/system/staging.tfstate"
encrypt  = true
role_arn = "arn:aws:iam::111111111:role/study-infra-terraform-role"
2. /study-infra-aws-tutorial/terraform/system/staging/staging.tfvars を作成する。
- iam_role_for_terraform:Terraform実行用RoleのARNに変更する。
- bucket:Stateを管理するS3バケット名に変更する。
- role_arn:Terraform実行用RoleのARNに変更する。
iam_role_for_terraform = "arn:aws:iam::111111111:role/study-infra-terraform-role"

network_remote_state_config = {
  bucket   = "sample-bucket"
  key      = "study-infra-tutorial/staging.tfstate"
  region   = "ap-northeast-1"
  role_arn = "arn:aws:iam::111111111:role/study-infra-terraform-role"
}
3.Dockerイメージをビルドする。
$ docker build \
  -t study-infra-tf:${IMAGE_VERSION} \
  --build-arg AWS_ACCESS_KEY=${AWS_ACCESS_KEY} \
  --build-arg AWS_SECRET_ACCESS_KEY=${AWS_SECRET_ACCESS_KEY} \
  --build-arg ENV=${ENV} \
  .
4.コンテナを起動して接続する。
$ pwd
-> 「***/study-infra-aws-tutorial」に居ること。

$ docker run --rm -v $PWD/terraform:/tf -it [ImageID] ash
5.Terraformを初期化する。
$ cd /tf/system/stating

$ terraform init -backend-config=example.tfbackend
Initializing modules...
- network in ../modules

Initializing the backend...

Successfully configured the backend "s3"! Terraform will automatically
use this backend unless the backend configuration changes.

Initializing provider plugins...
- Finding latest version of hashicorp/aws...
- Installing hashicorp/aws v3.68.0...
- Installed hashicorp/aws v3.68.0 (signed by HashiCorp)

Terraform has created a lock file .terraform.lock.hcl to record the provider
selections it made above. Include this file in your version control repository
so that Terraform can guarantee to make the same selections by default when
you run "terraform init" in the future.

Terraform has been successfully initialized!

You may now begin working with Terraform. Try running "terraform plan" to see
any changes that are required for your infrastructure. All Terraform commands
should now work.

If you ever set or change modules or backend configuration for Terraform,
rerun this command to reinitialize your working directory. If you forget, other
commands will detect it and remind you to do so if necessary.
$
6. terraform plan を実行する。
planの結果、エラーが無いようであればOKです。
$ terraform plan -var-file=staging.tfvars7. terraform apply を実行してリソースを構築する。
$ terraform apply -var-file=staging.tfvars以上で、ALBの作成が完了です。
これにて本記事は終了です。


コメント